|
By Gideon Waxman of Drum Helper.
Recording drums is widely regarded as one of the trickiest skills to learn for a studio engineer. This is because there is a lot of equipment to set up, specific techniques to grasp, and a lot of tuning involved!
The drum set is the most time-consuming instrument to record, so it’s important to take a thought out and structured approach. It requires patience and a clear vision of what you want to achieve from the recording session. I have written this guide to show you that by following basic principles you can obtain great drum sounds without having to rent a world-class recording studio. Why Go to The Effort of Recording Drums?
It’s understandable to feel that recording drums to a professional standard is both a challenging and expensive endeavor. But with modern audio interfaces and DAWs (digital audio workstations) such as Logic and Pro Tools, it is easier than ever before to obtain high-quality drum sounds from your own home. No matter what style of music you intend on playing, you are able to record drums with less equipment than you might expect; and the recording session can be executed on a budget without compromising on quality. Equipment Used For Recording Drums To start off this guide, let’s talk about the recording equipment you’ll need to capture quality drum sounds. Right before we go into the drum set up and tuning let’s talk about gear. In addition to a drum set, you’re going to need a computer, microphones, stands, XLR cables, and an audio interface with enough microphone inputs. Computer
Recording drums with Logic, Pro Tools, Cubase (or similar DAW) on a computer removes the necessity for an enormous multi-million-pound recording studio. If you don’t know where to start with a digital audio workstation (DAW), check out this helpful guide that details all the best DAWs available currently.
You have the ability to record, edit, and mix all the channels directly on your laptop. A DAW removes the need for expensive studio equipment such as microphone preamps and analog equipment such as EQs and compressors to process the signal with. Expensive analog equipment will certainly enhance the sound of the drums from a recording session, but for a beginner, they are not essential and are therefore a luxury. You are able to use any computer that is compatible with a DAW such as Logic or Pro Tools and has the connectivity for an audio interface that can accommodate the number of microphones you wish to use. Most modern interfaces utilize USB connectivity. Microphone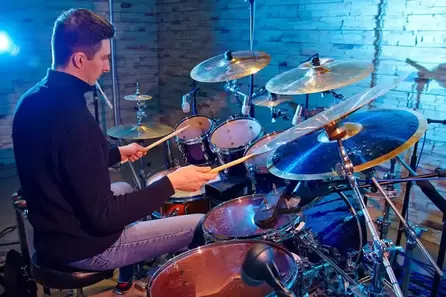
To record the best sound drums possible, you will need a complete set of optimized drum microphones. Each microphone is tuned for different parts of the drum set. A full drum mic kit will be comprised of close mics and overhead mics.
I would recommend the Audix DP7 Drum Pack as the best drum mic kit that delivers premium quality sounds whilst still being pretty affordable in long run. The set contains 7 excellent drum mics that pick up accurate and clear sounds for each respective part of the drum set they are designed for.
When buying microphones I generally recommend buying new; because they will be covered by a manufacturer’s warranty. You can guarantee they are free from damage, and you will avoid the risk of counterfeit microphones. Drum microphones utilize polar pickup patterns that make them ideal for recording drums. All of the microphones featured here have cardioid pick up patterns, besides the D2 and D4 microphones that have a hypercardioid pickup pattern for a tighter response and optimal feedback rejection. This is a technical term that means that the microphone rejects sound from the back and sides, but it successfully picks up sound from the front. Audio Interface for Recording Drums
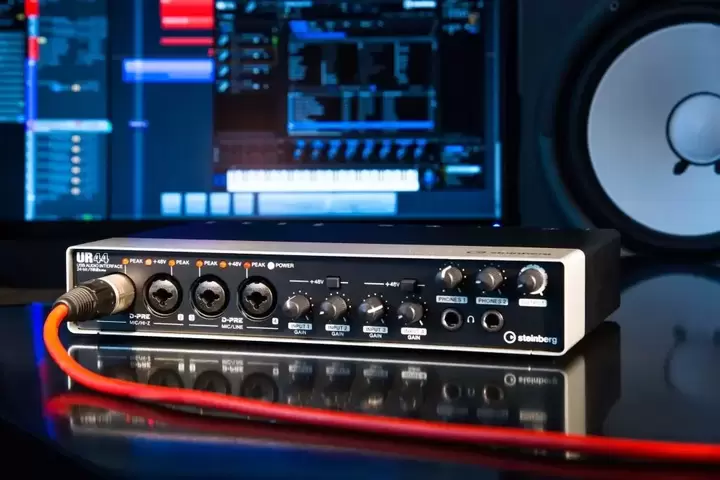
To record drums you will need an audio interface that can accommodate as many microphones as you intend to use.
For recording drums in a home studio – to record with a full set of drum microphones you will need an interface that features 8 microphone inputs or more. Modern audio interfaces offer high sample rates; have multiple outputs and feature USB connectivity for your computer. XLR Cables
Straightforwardly enough, you will need enough XLR cables for the number of microphones you plan on using for your recording session.
I would recommend buying quality, gold plated XLR cables that are at least 15 feet in length to ensure they are long enough between the microphone and audio interface. THE DRUM SET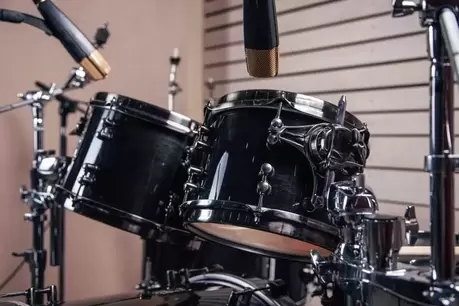
Of course, you will need your drum set and the best cymbals you can get your hands on for recording drums! An important piece of advice I learned a long time ago is that the quality of the recorded input will always translate into the end result.
This applies to both the quality of the drummer’s performance and also how the drums themselves sound. If you play a high-end drum set with brand new drum heads and spend the time tuning the drums up great then the drum sounds will be killer! Combine this with a strong performance marked by clear and tight playing – and you will have great sounding raw stems to work with even before mixing the audio. For the recording session, it’s best practice to buy brand new drumheads because they provide brighter and focused sounds as opposed to old, worn-in drumheads. New drumheads will noticeably enhance the sound of the drums for the recording. Drums are required to be tuned and dampened in order to achieve your desired sound, and the drumheads contribute up to 70% of the entire drum sound. Cymbals on the other hand cannot be tuned and their sounds cannot be altered. Cymbals maintain their inherent sound from the day of purchase and poor quality cymbals will protrude a mix. No microphone technique or equipment can prevent bad cymbals from sounding awful. And the same applies to poorly tuned drums.
Tuning Drums
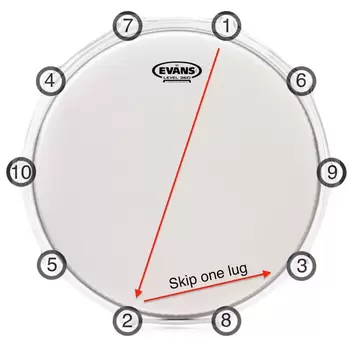
Correct drum tuning is essential for achieving a good drum tone. It’s even better when paired with a selection of brand new drumheads for your drum set. It can take a long time to develop an ear for fine-tuning a drum. Luckily there are useful tools called precision drum tuners – which help aid fast and accurate drum tuning. These devices measure either the pitch or tympanic pressure of a drum to determine tuning inconsistencies around the lugs and therefore allow you to make precise corrections to get your drums evenly tuned. With or without a precision drum tuner, it’s vital to use your own ears when tuning drums to achieve a clean drum tone, with even pitches around the lugs of the drum.
There is no ‘correct’ pitch to tune to, and drummers will like to have their drums tuned differently. Some professional drummers love their snare drum to be cranked up as high as it can go. And others might love a vintage sounding ‘thud’ – essentially as low tuned and muffled as a snare drum can be.
The Room
The recording space itself will have a huge influence on the sound captured in the recording. Ideally you will want the room to offer strong sounds already, but you can adjust the acoustic properties of the room fairly easily. If you are in a room with lots of carpet, thick curtains, and other objects inside the room to absorb noise, the room will sound dead as a result. The sound will be muffled and closed in. You can introduce some reflective surfaces to make the room sound livelier and have more natural reverberation. Large sheets of plywood work great for this. And if possible, remove any dense and overstuffed furniture or rugs that will be contributing to the dead sound. If you are recording in an overly live room with lots of reflective surfaces, such as a garage or office space then everything will be too bright. It is easy to treat an overly live room by introducing carpets, sound deadening curtains, blankets, duvets, and pillows to the surrounding area to absorb the excess sound.
Setting Up For Recording Drums
Before you start, remember to keep everything organized and tidy. The last thing you want is a rat’s nest of cables when you’re troubleshooting!
When setting up the drums and microphones make sure you don’t have any stands touching each other. It’ll cause unwanted noise going into the microphone and become a nuisance in the mix. Plug in your drum mics into the audio interface in the following order and then creating the respective channels in Logic for the microphones in the very same order.
How to Mic Drums
Kick drum Before getting ready to mic up your kick drum, ensure you have a porthole cut out in the resonant skin. Having a porthole allows you to record the kick drum with more attack and greater definition. The best size for a porthole is 4 or 5 inches, and cut out the porthole at the 5 o’clock position on the drumhead. Either take the drum to a professional shop or buy a specifically designed porthole cutter if you want to do it yourself. Placing the microphone closer to the batter head will provide more attack and beater definition. Whereas the further back the microphone is placed, the increased low end the microphone will pick up.
Snare Top
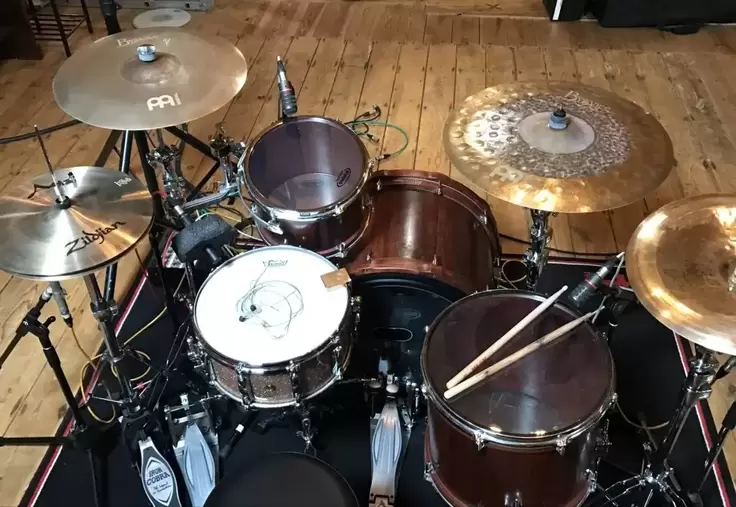
When setting up your drum set try and leave a space for the snare microphone and stand between the hi-hat and rack tom. If you want to receive more attack from the snare, aim the microphone at the center. And for more ring, point it towards the edge. A popular snare drum microphone position is to have the microphone hanging just over the edge and pointing at the center of the drumhead. If you have too much ring, raise the microphone up and away from the edge but still pointing at the center of the drum. For more ring, take the microphone up and angle it more to the edge of the drum closest to the microphone and away from the center. Try and keep the hi hat and rack tom in the rejection zone of the microphone pick up pattern. This is my friend Adam Pedder’s drum set up for a recent recording – my ideal microphone configurations, all facing the center of the drumhead.
Rack Tom and Floor Toms
The placement of each of the tom microphones follows the same approach as the snare microphone. Placing the microphone closer to the edge provides additional ring, and closer to the center offers increased attack. Drum microphone clips remove the necessity for additional stands and they allow for convenient tom mic placement. They are efficient and practical accessories for recording drums. Overhead Microphones There are a few different microphone placements you can use here. The important thing to remember is no matter what technique you use, the two overhead microphones have to be the same distance away from the snare drum to make sure the snare drum is in phase with the overheads and in center of your drum mix. The technique to try first is a Spaced Stereo Pair or A/B. Place the microphones over the left (above the hit and crash) and right-hand side of the drum kit (over the ride and second crash). The higher you place the overhead microphones results in more room sound, and the closer they are to the drums results in a more direct drum sound. Phase Phase is an issue that occurs when the signal from two separate microphones pick up the same sound source and are out-of-sync with one another. Phase is essentially a technical word for time, and each microphone around the drum set will pick up every sound at a unique time. Phase issues occur when the waveforms captured by separate microphones cancel each other out. The goal is to get all of the microphones working together constructively when recording a full drum set. Successful phase interaction is essential for achieving cohesive drum sounds. You will be able to see any signs of phase within the waveforms on your DAW, if the peaks of one track align with the troughs of the other. The audible sign of phase problems will be a thin, diminished sounding signal with no audible bass. The easiest way to avoid phase problems is to ensure the overheads are an equal distance from both the center of the snare drum, and from where the kick drum beater hits the skin. An easy way to do this is by using a long piece of string to measure the distance between the center of the snare drum skin and each of the overhead microphones.
Ready To Record Drums
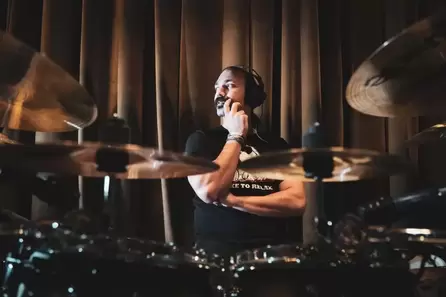
With all of the microphones set up, plugged in and the channels loaded into your recording software, run a test take and listen carefully for any rattles, buzzes, or other sources of unwanted noise.
Using the best microphones you can afford means you should receive a clear signal into each respective channel in the DAW. Don’t record things too hot! Get levels from playing the drums and try and keep everything in the green. This avoids your signals from clipping and distorting. At this point, once everything is set up to how you like and you are completely happy, it is very important to not move anything! To succeed with consistent results you must not tamper with any microphone positions. Recording Drums Tips
Mixing The Drums
Now that you have recorded your best drum tracks, it’s time to process and mix the audio to really bring the drums to life. By mixing the raw drum stems you can focus and balance each individual part of the drum set.
There is a wide range of valuable production tools and effects that are used to enhance sound recordings. I will provide an overview and instructions on some of the most important tools used in sound recording. When mixing audio you will need to use a high-quality pair of headphones or a pair of studio reference monitors. This is by no means a list of ALL of the sound recording tools available, but these are the most essential tools to enable the drums to sit well in a mix, whilst adding clarity and punch. The following will all be available as plugins within your digital audio workstation. PanningPanning is a tool that spreads a signal in a multi-channel sound field. It’s crucial for making up a complete stereo image and creates the impression of space within a mix. Panning is important for mixing drums because it mimics the realistic effect of a drum set stage sound. Using panning creates a wide sounding drum set that can be heard from all sides. The best way to pan drums is to pan the separate parts of the drum set how they appear before you as if you are playing the drums. This is called “Drummers Perspective”.
EQ
EQ is a corrective and creative tool used within sound recording and reproduction to correct frequency responses using linear filters. EQ is used to strengthen or weaken frequency bands to alter a signal’s sound. What this means is that EQ allows you to adjust the frequencies of a signal to improve how it sounds. EQ is your best friend in recording. It is incredibly important for balancing sounds to create a mix that allows a listener to hear all the individual parts of a drum set with clarity. Use your ears when using EQ for your drums – they are the most valuable tools at your disposal. To get your drum sounds in the right ballpark, here are some engineer-approved tips for drums:
Compression Compression is the process of lessening the dynamic range between the loudest and quietest parts of an audio signal. The goal of compression is to even out unwanted level variations of a signal. For drums, this means turning down louder hits to match softer hits in order to make the drum sounds more balanced overall. Compression is a fairly complex tool, and there is no ‘one-size fits all’ compression setting. But proper use of compression will help smoothen out the shape of the drums and keep dynamics under control.
Reverb Reverb is another essential tool in modern recording. Reverb exists all around us, and within music production, the aim is to emulate a natural acoustic environment for your sounds. Digital reverb plugins mimic the way a real acoustic space works. They are designed to simulate reflections, and echoes, and the decay of high versus low frequencies. Reverb is important for bringing life to drums and to make them sound punchy, lifelike, and full within a mix. Use your ears to achieve an optimal balance for reverb. Even if you want explosive drum sounds, don’t go overboard. The choice of reverb will need to fit with the emotional quality of a song and its mix. There are five main categories of reverb. Use your ears and experiment with the different types of reverb and see what works best with your drum sounds.
Alternative Configurations For Recording Drums Recording drums with 2 mics is possible, and in fact, it is a great way to achieve good sounds with minimal equipment and setup. Recording drums with 2 mics will sacrifice lots of the close mics, meaning there will not be as much clarity and depth to each drum. However, recording drums with just a couple of microphones is more convenient and inexpensive when compared to using a complete set of drum microphones. Recording drums with 2 mics will require using a kick drum mic, which will be paired with one overhead microphone. The aim is to capture a balanced, full sounding drum set from this microphone pairing. Ilan Rubin – the drummer of Nine Inch Nails demonstrates the capabilities of a dual microphone pairing for recording in this video. The drums sound amazing considering it’s recorded with only 2 microphones. Final Thoughts on How to Record Drums Whether you are learning to record drums from home or renting out a recording studio to capture drum sounds; I hope you can draw some valuable information from this guide. I have recorded drums in professional studios and from home with the very same set up listed in this guide. Following these steps and taking a careful approach will reward you with great sounds! You will learn and discover new things by making some mistakes along the way. But don’t be put off or get frustrated because this is somewhat inevitable! If you feel stuck there are online communities and forums with engineers and drummers who, from my experience, are keen to help. Patience truly is key when it comes to recording drums. There are lots of steps and techniques involved, but recording drums from your own home is both a valuable and rewarding skill. And it’s never been easier to record and mix quality drums with a computer, interface, microphones, and a drum set. It’s fun, creative, and rewarding – so get practicing and set up your drums and microphones to record amazing drum sounds from home. Happy recording! Comments are closed.
|
News ListArchives
July 2024
|
|
|
CONTACT US:
Sweet Relief Musicians Fund 2650 E Imperial Hwy Ste 208 Brea, CA 92821-6135 Tel. 714-626-0447 Fax 714-626-0473 Toll Free Assistance line 888-955-7880 |
Sweet Relief Musicians Fund is a 501(c)3 non-profit charity. Federal ID# 95-4443269
© Sweet Relief. All rights reserved 2024.

 RSS Feed
